Drupal 8, JSONAPI and Ember Part 1: Building a Decoupled Web App

Drupal 8 and JSONAPI together make a great combination to expose content to a front-end framework. Let's see how Ember connects so easily to this combination.
Drupal 8 and JSONAPI
There have been many articles over the past year or so as the JSONAPI module has gained some serious momentum. Right now, there is currently an issue to get JSONAPI as a Drupal 8 core experimental module in 8.4! (The issue is here) The JSONAPI module implements the JSONAPI standards and exposes all Content Entities without any additional configuration needed. You can checkout the JSONAPI specs here. And there are also Drupal 8 specific docs for the JSONAPI module here (I highly recommend reading those docs before getting too far in this guide)
I will start here by assuming you know how to spin up a new Drupal 8 site (8.3 is out!) and in my example I am using Docker for Mac to run my local sites (but with this guide it shouldn't matter what you are using). So I will skip that long-winded part and skip straight to creating content types! This example here is going to create a site that has this set of content types:
- Blog Post
- Location
- Product
- Product Type
Then we will create an Ember application that will consume this data through JSONAPI endpoints and will serve as the front-end of the site. In the end you will have a fully decoupled Drupal site with Ember as a front-end.
So let's begin!
Content Types
Let's begin by downloading some desired modules for our Drupal 8 site. I've provided an example package.json file to use for this example if you'd like. (This also assume you are managing your site's dependencies with Composer, which you should! Refer here for information on managing your Drupal installation with Composer.
Now with a simple composer install we should have all of our modules. Let's install them all.
.. Great! Now that you have everything installed, let's get to the good stuff. Let's start by creating our Blog Post content type. (One of the parts I'm skipping here is setting up the Media entities and entity browser as those would require a bit more time. So where you see the images as Entity Reference fields you can just use the Image field instead.)
Here's a screenshot of the fields I created:
NOTE: Instead of the field_blog_image being an entity reference field you would create it as an image field.
I defaulted the Blog Content field to be the Full HTML text format and only allowed one value for the Content and Image fields.
Next let's create the Location content type! (Before creating this content type, create a taxonomy vocabulary called "Location Type" and add a couple terms.) Here are the fields:
Here the Location Type field will reference the Taxonomy terms from the Vocabulary "Location Type". For the Geolocation field, for the map to work you will need to set up a Google Maps API Key and plug that into the Geolocation options under Configuration -> Web services -> Gelocation settings. Under the Manage Form Display for this form, make sure the formatter for the Geolocation field is the Geolocation Google Maps API - Geocoding and Map formatter.
Creating some content
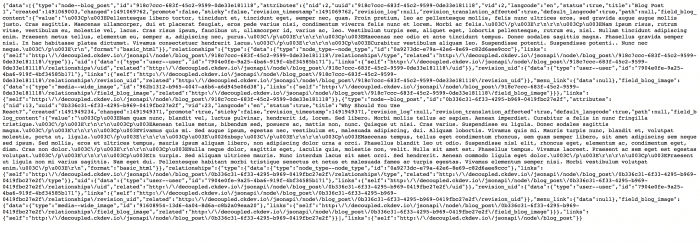
We will start with these content types to see how they are exposed through the JSONAPI. First let's create a couple Blog Posts and a couple Locations. Once that is done, if you hit {local-site-url}/jsonapi/node/blog_post from your browser you should see an output kinda like this:

Look at that, without doing any additional configurations the Blog Post nodes are exposed with all of the relevant info off the node! You'll also see that the image field is not in the attributes key of each node in the JSON output, but it's in the relationships key. This is because now all images are actually Entities, so the image field is actually just a reference to a file. As you can see for that relationship there is a type key with the value of file--file.
So now that we see how easy it is to expose the entities, how easy are they to consume? Well with Ember it's actually extremely simple! So let's kickoff the Ember app.
Igniting our application
First things first, make sure you're using a newer version of node (I'm currently using v7.8.0) and let's install the Ember CLI tool:npm install -g ember-cli
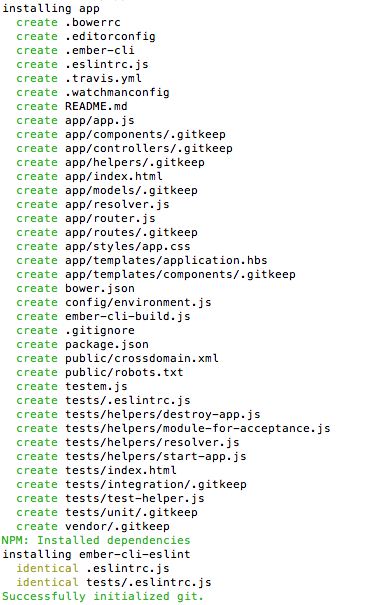
And then we create our app:ember new emberapp
And you'll see an output like this:
Ember has a built in dev server we can use to boot up the app. So from the emberapp directory let's call ember serve. The app will be served up on http://localhost:4200 and will update the app when files changes are made. It's that simple to get an Ember app going! If you haven't used Ember before, but you have used some form of MVC style JS Framework, this will feel familiar. If you have not used any MVC/MV*JS framework before, then I will go over a couple basic things about Ember (but I highly suggest reading up on it and doing the tutorial here).
Ember basics
All of your applications files will live inside the app directory. When you build the application it will get built into dist. The public directory is for any assets you want included with the app (images, fonts, etc etc). Any directories/files in public will get compiled into dist when you build the Ember app (which by the way is a simple ember build command away!).
The 4 basic building blocks of any Ember app are:
- Routes
- Models
- Templates
- Components
Routes are the defined URLs the user can/will hit inside your app.
Models are the defined data "structures" of your app (in our case they define the content types from Drupal we want to use).
Templates are Handlebars files used to render out the Apps interface based on the Route you are on.
Components are reusable Handlebars templates.
For Next time
For the next part you should play around with Ember and familiarize yourself with the handlebars syntax, as in the next post we will create the Routes, Models and Templates needed to consume the content from Drupal. Happy coding!
Want to talk about how we can work together?
Ryan can help

