Configure ESLint, Prettier, and Flow in VS Code for React Development

This short guide will provide you a consistent and reusable development workflow for all React/React Native projects. The more effort you put into writing quality code, the less time you spend on debugging. You can increase your code quality and reduce the time spent on debugging with a consistent development workflow. In this guide I will show you how to configure your editor to handle your code formatting, linting, and type checking.

Test Driven Development and a preconfigured build configuration are recommended. I won't go into much detail on either of these. I recommend create-react-app for the web and using the React Native CLI for mobile development. Both require zero build configuration. Jest is fantastic for testing React.
Installation
To get started download and install VS Code. If you're on a Mac you can launch VS Code from the terminal, here's how.
I use VS Code for my editor of choice. If you use Sublime Text or Atom this article still applies but you'll need to use the relevant text editor extensions for your text editor.
Let's generate our app without any configuration! For this article we'll use the React Native CLI, but you can follow along with create-react-app as well.
$ react-native init SweetApp && cd SweetApp
Open the SweetApp project with VS Code.
$ code .
Once you have VS Code open, click the Extensions button in the Activity Bar. Install the following extensions:
ESLint Setup
We will install ESLint using Airbnb's linter rules. Refer to Airbnb's JavaScript Github Repo for the installation instructions.
Then install babel-eslint$ npm install babel-eslint --save-dev
You should now see an .eslintrc.json file in your project. Open the eslintrc file and configure it like so:

Prettier Setup
Since we are using Prettier with ESLint there is very little setup required to get Prettier working. We've installed the Prettier-ESLint extension, now we need to tell VS Code to format our code using a code formatter (Prettier) after saving a file.
Press CMD + , if you're on a Mac to open your VS Code User Settings and enable format on save.
// Format a file on save. A formatter must be available, the file must not be auto-saved, and editor must not be shutting down.


"editor.formatOnSave": true
Flow Setup
Flow is a static type checker for JavaScript and is included in your project if you use the React Native CLI or create-react-app build configurations.
From your terminal install Flow using Homebrew.
$ brew install flow
"Flow works best when installed per-project with explicit versioning rather than globally."
To run Flow per project we will install flow-bin from npm. Later we will configure VS Code to run Flow from node_modules in lieu of the global Flow installation.
Before installing flow-bin we need to figure out which version to install. Open the .flowconfig file and scroll to the very bottom where you'll find the version number. This is the version of flow-bin we want to install from NPM. As of the day this article was published, the Flow version to use is 0.42.0.
We also need to install the babel-preset for Flow.
What are babel-presets?
$ npm install flow-bin@0.42.0 babel-preset-flow --save-dev
Open the .babelrc file and add Flow as a preset then add the config ["retainLines": true][22]
Your .babelrc file should look like this:
{


  "presets": [


    "react-native",


    "flow"


  ],


  "retainLines": true


}
Now we want to tell our editor to use Flow from the projects node_modules directory. We also want to disable JavaScript validation for this project only to fix a known issue.
Open the Workspace settings.json file and add this:
// Support using flow through your node_modules folder, WARNING: Checking this box is a security risk. When you open a project we will immediately run code contained within it.
"flow.useNPMPackagedFlow": true,


// Enable/disable JavaScript validation. (For Flow)
"javascript.validate.enable": false


// Enable/disable default JavaScript formatter (For Prettier)
"javascript.format.enable": false
Disabling the default JavaScript formatter allows Prettier to handle our code formatting.
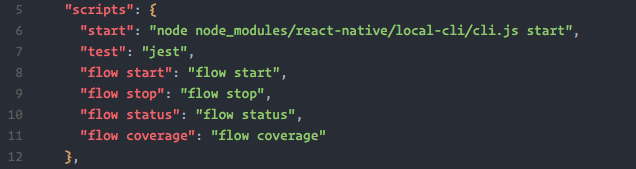
Let's create some npm scripts for Flow.
Open the package.json file and add the following scripts.
// start the flow server
"flow start": "flow start",


// stop the flow server
"flow stop": "flow stop",


// check the flow status
"flow status": "flow status",


// check the flow coverage percentage
"flow coverage": "flow coverage"
Your scripts in package.json should now look like this:
From the same directory as your package.json file run the following terminal command.
$ npm run flow start

The Flow server is running and will perform type checking on any file with a // @flow annotation at the top of the file.
Testing your new development workflow
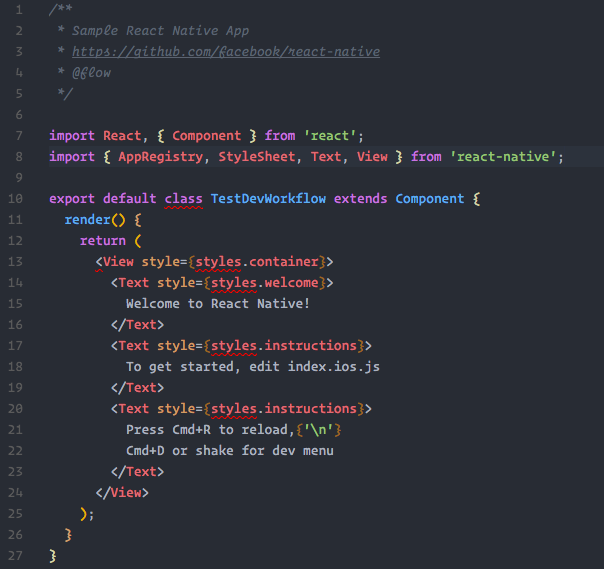
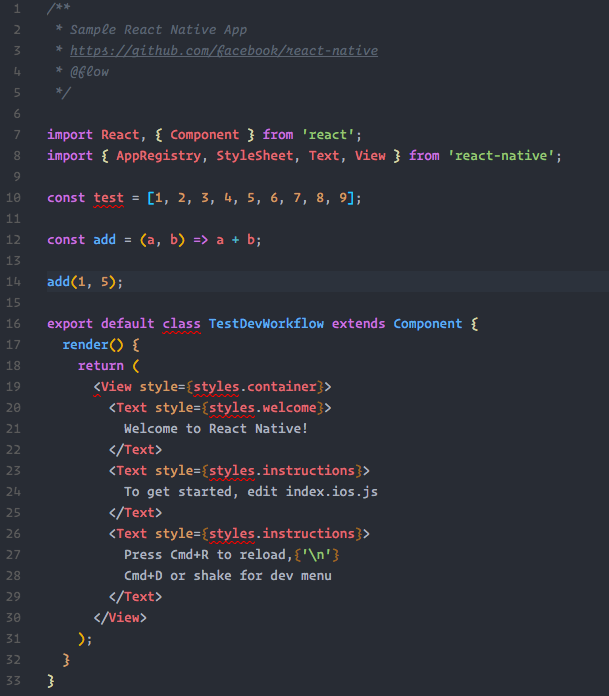
Open the index.ios.js file in the SweetApp project.
Don't use the
index.android.jsfile as the.flowconfigfile ignores it. See this post on Stack Overflow to use Flow with.androidfiles.
ESLint Linter
You should notice red squiggly lines in your code. You can hover your mouse cursor over the red squiggly line and ESLint will tell you the linter rule causing the warning.
Delete the semicolon at the end of the return statement inside the class render method. Hover your mouse cursor over the red squiggly line and you'll see ESLint warns you about the missing semicolon!
If you are not receiving any linter warnings please review the ESLint Setup portion of this guide.
Prettier Code Formatter
Prettier will auto-format your code based on it's rules whenever you save a file.
Add an array of numbers and save the array to a variable called test. Format the array of numbers like so:
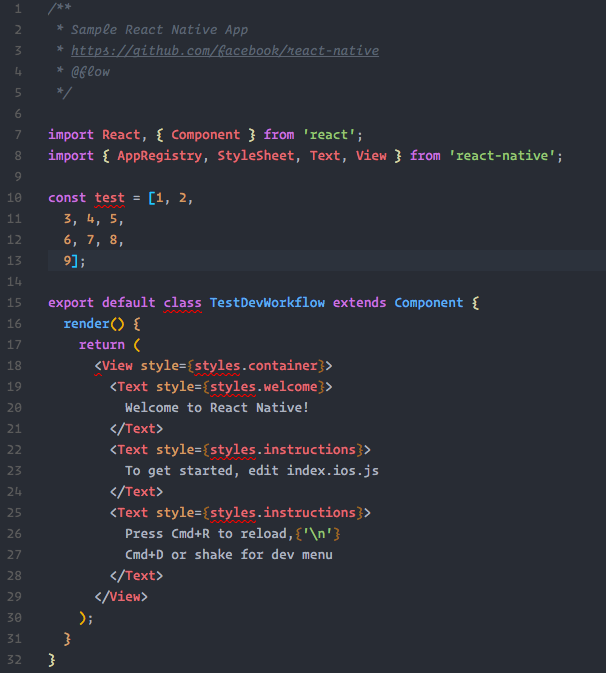
Now save the file and watch the magic of Prettier take effect!
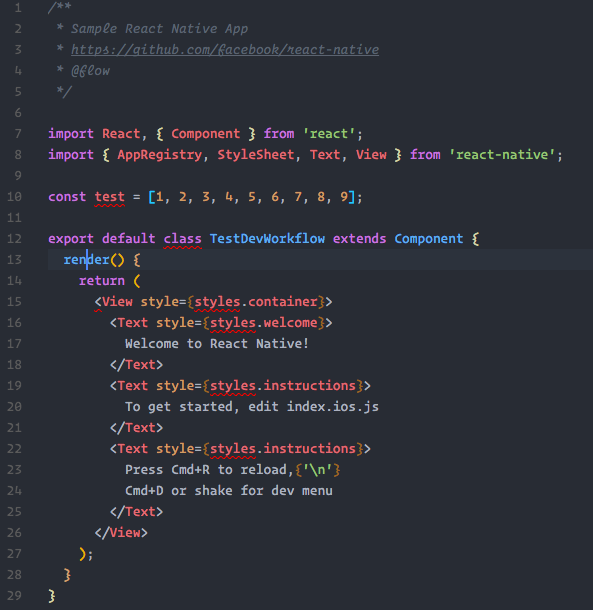
The test array is now formatted correctly!
Flow Type Checking
To ensure Flow is working run the flow start npm script to start the Flow server that runs in the background.
$ npm run flow start
Create an add function that returns the sum of two numbers.
Now let's add the WRONG types (string) to the add function parameters and return type.
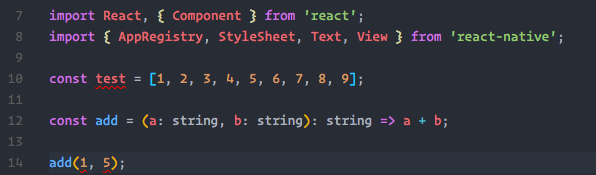
Notice after saving the file red squiggly lines appear under the number parameters of the add function invocation. Hover your mouse cursor over the red squiggly lines and Flow informs you:
[flow] this type is incompatible with the expected parameter type of string
Let's fix the add function to use the correct number types.

The Flow type errors are gone!
A cool feature of the Flow VS Code extension is the always up-to-date Flow coverage percentage in the Status Bar.

You're all set!
Hopefully this guide saves you the headache I experienced and makes for a great reference guide now and in the future.
Happy coding!


Want to talk about how we can work together?
Ryan can help